API token for Zendesk
This feature will allow you to automatically add an email and transfer selected information from Zendesk to SurveyLab, and then based on this information customise and send a survey.
SURVEYLAB
STEP 1. Generate and get access to SURVEYLAB API TOKEN
- Go to account
 Settings.
 - Go to Integrations.
- Go to SURVEYLAB API TOKEN section and press RESET API TOKEN button.

STEP 2. Create and set up survey collector.
- Go to your survey list, select survey, and press
![[C]](https://www.surveylab.com/UserFiles/640d81fbf8d6/Image/ico_material/baseline_repeat_black_18dp.png) COLLECT RESPONSES button.
COLLECT RESPONSES button.
- Press + ADD COLLECTOR button.

- Enter the collector name.
- You can select between Email and Email embedded (single question).
- Press SAVE button.

STEP 3. Get API connector URL
- Go to your survey collector.
- Press SETTINGS button.

- Press API link button.
- Copy selected survey link and replace information in brackets [ … ].

URL structure
https://www.surveylab.com/api.php?apiToken=[TOKEN]&cId=[COLLECTOR ID]&email=[DYNAMIC RESPONDENT EMAIL]&crk=[DYNAMIC CRK DATA]&referrer=[DYNAMIC RESPONDENT DATA]&language=[DYNAMIC LANGUAGE]
Example
| Description | Example | |
|---|---|---|
| apiToken | API token generated in SurveyLab. | yadfhjs |
| Email on which system will send a survey. | email={{ticket.requester.email}} | |
| crk | Response Key (must be unique). | crk={{ticket.id}} |
| referrer | Any kind of information. | referrer={{ticket.url}} |
| language | Survey language (ISO code). | language={{ticket.requester.language}} |
| custom1 | Custom information. | custom1={{ticket.id}} |
| custom2 | Custom information. | custom2={{ticket.id}} |
| custom3 | Custom information. | custom3={{ticket.id}} |
| custom4 | Custom information. | custom4={{ticket.id}} |
| custom5 | Custom information. | custom5={{ticket.id}} |
| custom6 | Custom information. | custom6={{ticket.id}} |
| custom7 | Custom information. | custom7={{ticket.id}} |
| custom8 | Custom information. | custom8={{ticket.id}} |
NOTE. A pair of email and crk must be unique per Collector. It means that with the above example URL setting, you can have only one survey response for each ticket. If you need more than one response per ticket, then crk value must be more complex and contain additional data that will make it unique.
ZENDESK
STEP 4. Set up Extensions in Zendesk.
- Log into Zendesk and go to Admin panel.
- Go to Extensions.
- Press add target button.
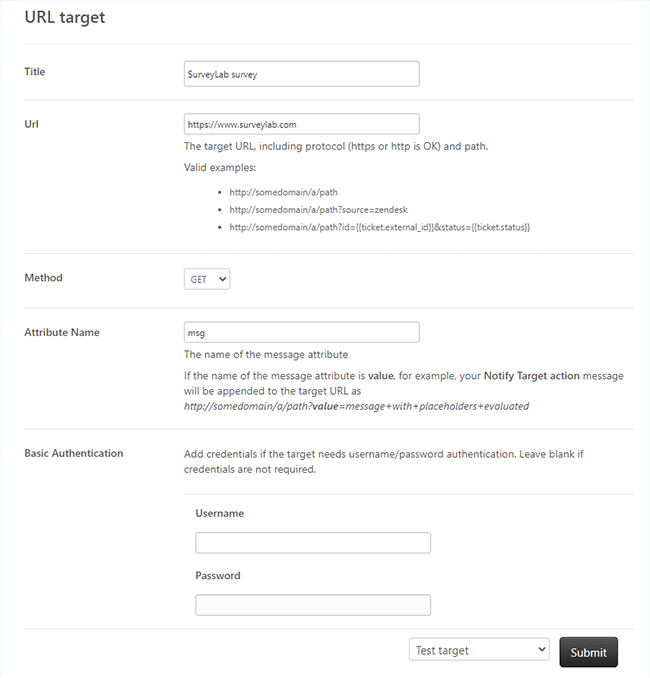
- Select URL target ».
- Set [1] Title, [2] URL target (URL that you have copied from surveylab.com), and [3] Attribute name.
- Press [4] Submit button.


NOTE. URL
- When you copy / paste chunks of URL (for example, API token), it is important to check for extra spaces that may be added by Zendesk.
- It is important to use the suggestion feature for Zendesk variables.
- Zendesk suggester only works when you add each variable after the previous one, so you can’t add a variable to the end of the URL and then to its beginning.
NOTE. Submit / testing
- Default action of “submit” is to send a test ping to API URL, when it is done right a test email should be visible on your collector contacts list (eg. [email protected]).
- If you tested properly, then switch the “submit” action to Create target using previously added extension.
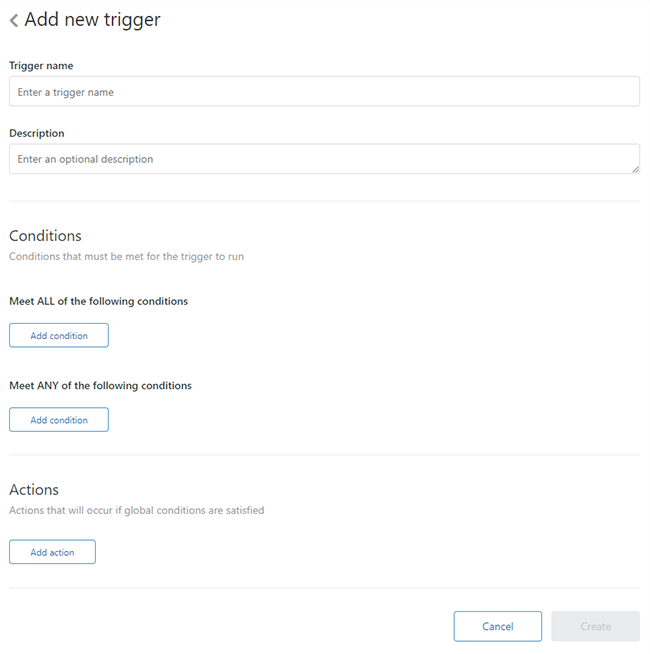
STEP 5. Set up Triggers in Zendesk
- Go to Triggers.
- Press Add trigger button.
- Enter trigger name.
- In Meet ALL of the following conditions press Add condition button and select Status | Is |Solved.
- In Actions, press Add action button and select Notify target | SurveyLab survey.
- Enter Message.
- Press Create button.
NOTE. Please remember that the Zendesk trigger message can’t be empty.
![]() Functionality is available in the Professional and Enterprise plan.
Functionality is available in the Professional and Enterprise plan.